1. Simple app
In our simple app, we will build the flow which has the following features:
- Entering email
- Leaving comments
- Creating a Zendesk ticket with email and comments
- Selecting a date
- Sending the message to Slack channel with email and date
- And we will add logic for emails.
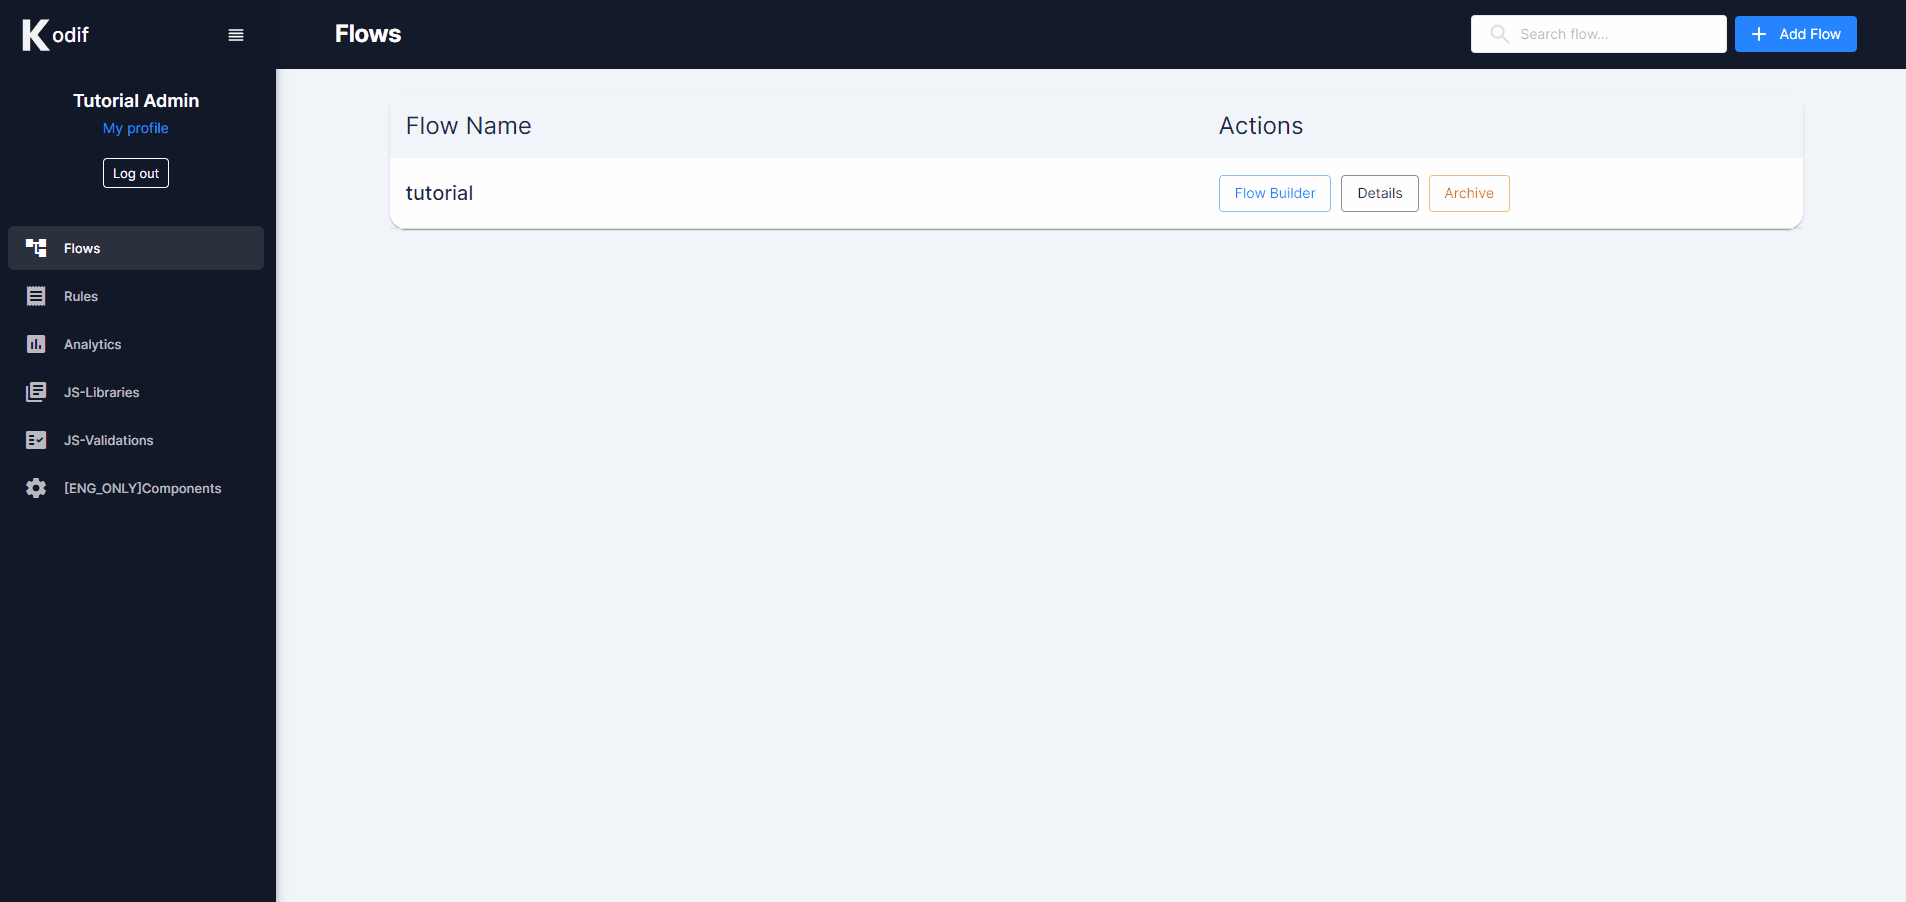
Creating a flow
On the Flows page, we need to click on "Add Flow" button, set the flow name and click on "Create Flow" button.
After that, our "Demo" flow will appear in the list of flows, and we need to go to the "Flow Builder" section.
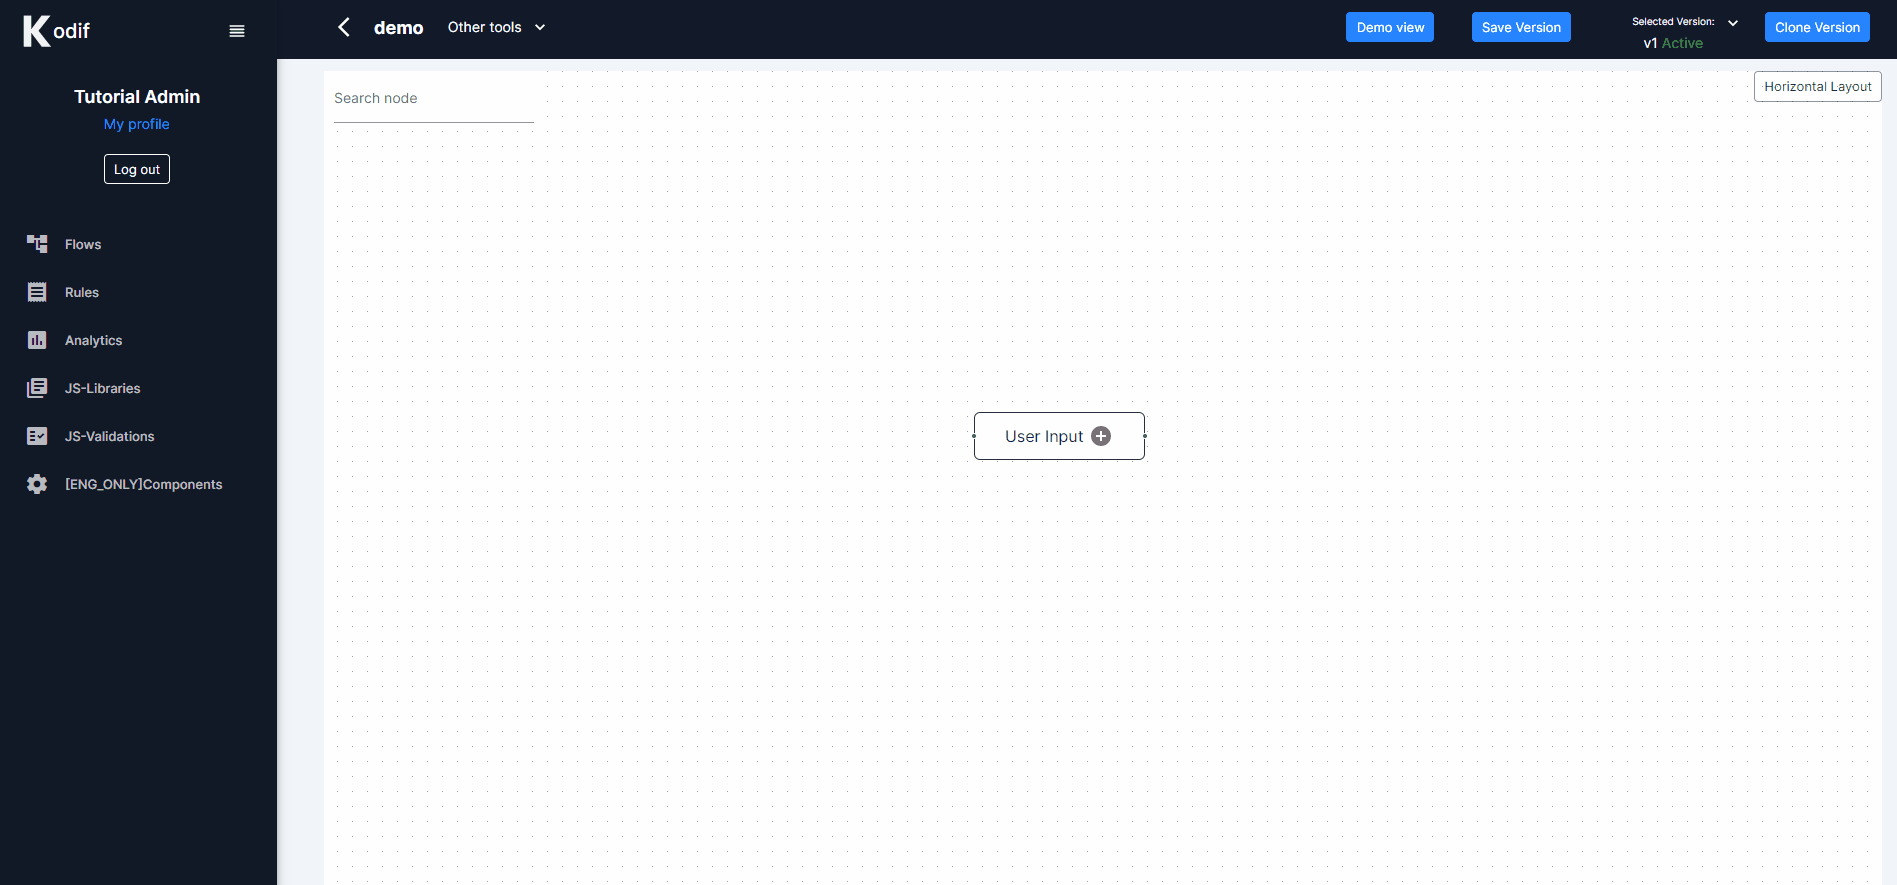
First, when we open the flow, we will see the window where we need to set version of the flow. You can create any versions, for example, 'v1'. And after setting the new version, we need to add nodes to the flow.
Creating nodes
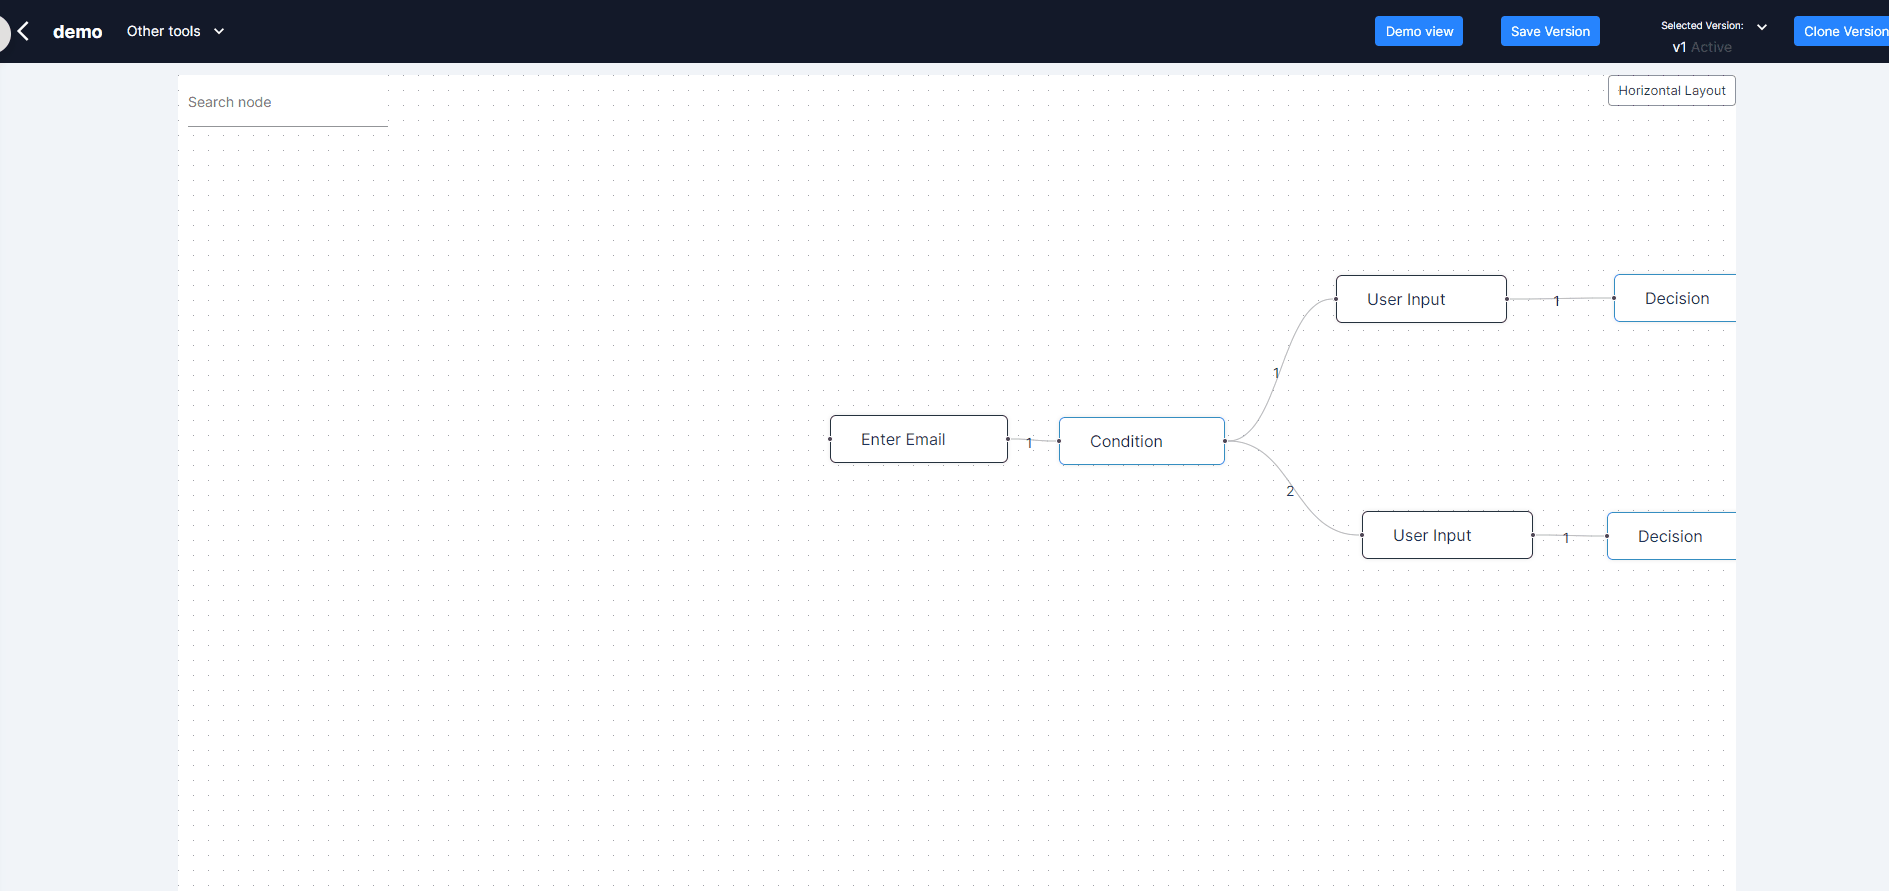
When our flow is ready, we can start adding nodes.
When we hover over the node, we need to click on a plus "+" icon and add nodes to the flow.
Also, we can change a name of the node by clicking on a node itself and editting the name on the right panel.
Adding components
For each "User Input" node we need to add components. To open the UI builder,first, we need to click on a node, then, click on a pencil icon next to the "UI Builder Preview" text.
It will redirect us to the UI Builder page.
There are Components panel on the left side of the UI Builder page. We need to add Components by clicking the plus "+" icon. Then, we add a Container component, and inside the Component Container, we need to add Text, Text field, and Button components.
After adding components, we can change text for each of them.
To change the component text, click on a Text component and go to the second tab - component configuration and change the Title in the Data section. Also, do the same for the Button text.
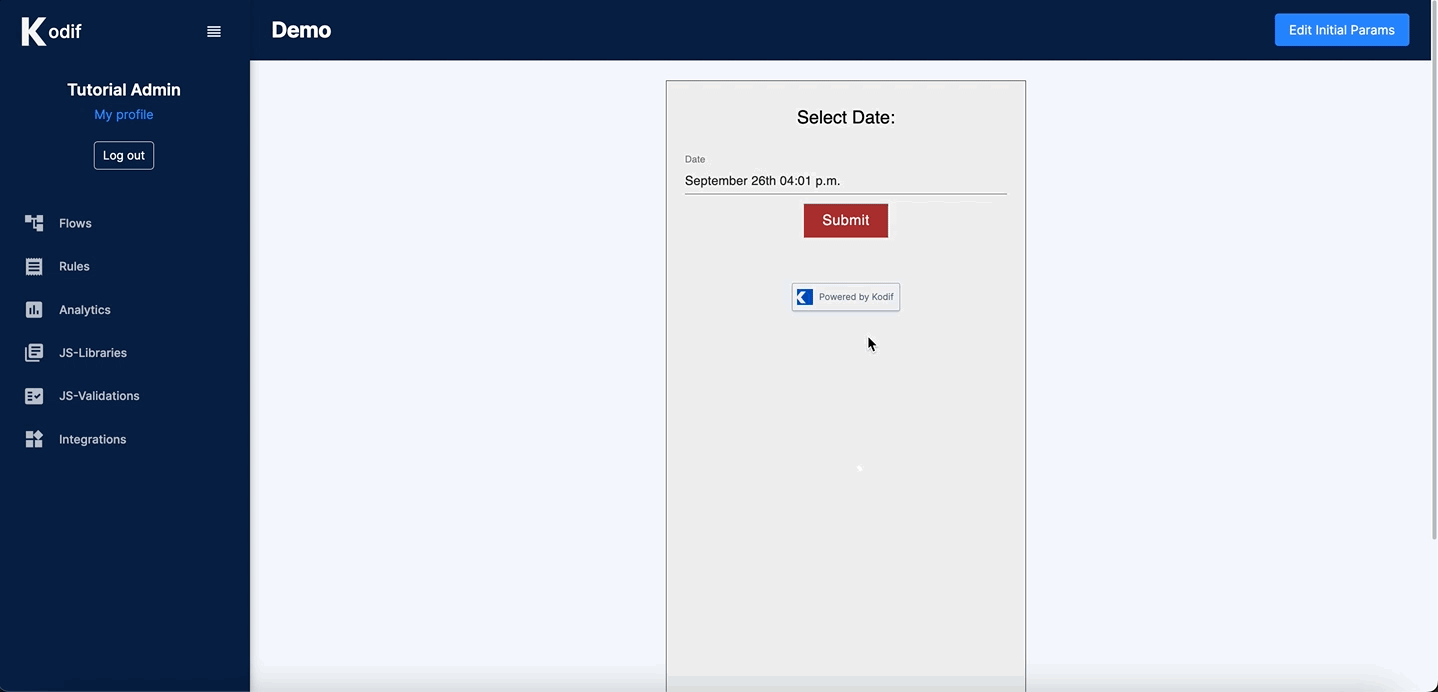
Result:
Here you can see the result of our simple app: